Sunday, July 26, 2015

Creating Swirling Ball Animations -- Color Crash Step 3


Now that we have balls dropping into the game it is time to start adding in some game logic. Eventually the screen will be so full of balls that there isn't room for anymore, but I'll leave the game over logic for later, first I want to start combining balls. I want to make it so that swiping between two primary colored balls produces a secondary colored ball. When this happens I could just remove one of the balls and then change the other ball into the new color, but it would be nice if there was a animation that happens when the balls are combined. So I am going to need some animation images.

My daughter went to BYU and their school color is blue, she just married a guy who is going to the rival school the University of Utah whose color is red, so their wedding color was purple, and that is the first animation I'll do, turning a red and a blue into a purple.

In Gimp I will open up my purple.xcf file that we created in step 1 and zoom into 400%.
 
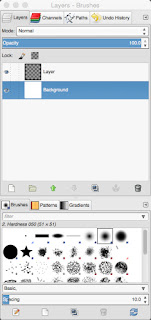
Now I am going to open the red.xcf and blue.xcf files as layers. In the menu File->Open as Layer and select both the red and blue files. I can see in the Layers - Brushes window that I have a bunch of transparent layers with nothing in them.
I don't need the empty layers. I'll select the empty layers and click on the little trash can to delete them. I now have a red layer a blue layer and a purple layer. Now I create a mask for the red layer by selecting the red layer and then in the menu Layer->Mask->Add Layer Mask... Select the White (full opacity) option and click on Add.
Now click on the new white mask layer next to the red layer to select it.
Now I want to make make a transparent spiral in the mask which will reveal some of the blue layer below. So in the Toolbox window I will select the pencil tool and set the brush size to be 5 and make sure the color is black.
I will now draw a spiral on the red ball which will reveal the blue ball below, and in the Layer - Brushes window you will see the spiral show up on the mask.
This will be the first image in my animation, so I will save it as purple001.xcf, then create a new directory called purple.atlas and and export it as purple001.png putting the png file in the atlas directory. 
OK, now I'll select the blue layer in the Layer - Brushes window and in the menu Layer->Mask->Add Layer Mask... select a White (full opacity) and Add. Then select the new mask layer.
Once again I will draw a spiral on the mask but last time I did a counter clockwise spiral and this time I will do a clockwise spiral to get a mixing effect. 
I want things to look like they are swirling so the red mask I am going to rotate counter clockwise. First I select the red mask in the Layers - Brushes window and then in the menu Select->All then click on the rotate tool in the Toolbox and click and drag counter clockwise a few degrees.

Then I'll click on the little anchorin the Layers - Brushes window to finish the rotation. And then save as purple002.xcf and export as purple002.png

I now select the red mask, rotate it a few degrees counter clockwise again then draw a new spiral in the mask.
Then I'll select the blue mask rotate it a few degrees clockwise and draw a new clockwise spiral using the pencil. We are now getting a nice mix of red blue and purple. I'll save this as purple003.xcf and export as purple003.png.

Then repeat the rotating the masks and drawing the spirals 2 more times each time saving then next image in the animation, purple004 and purple005.

Then copy the purple.png file from the images.atlas directory to the purple.atlas directory and rename it to purple006.png. I now have a 6 image animation that for combining a red and blue ball to create a purple ball.

I can now repeat this process with green blue and yellow, and orange red and yellow to create animations for green and orange. 
After creating the orange an green animations I can now go back to Xcode and select my images group and the menu File->Add Files to "Epic Color Crash" 
Now we are ready to do some more programming which will be the next step.

Saturday, July 25, 2015

Creating the Xcode Project (Swift/SpriteKit) -- Epic Color Crash Step 2

At the end of this project we will have three versions of this game, one is Swift and one in Objective-C using SpriteKit, and a cross platform version written in C++ using Cocos2d-x. This will give us a good feel for the differences in these options.

Preview: This is what you will have at the end of this step:

First the Swift/SpriteKit version

I initially wrote this in Swift using SpriteKit just because Swift and SpriteKit didn't exist when I did my last iOS programming projects and so it seemed like a great way to get to know the new language and the new framework.

I'm using Xcode version 6.4.

First I'm going to create an Xcode project, so I start up Xcode and select Create a new Xcode Project
If you don't get this dialog, then go to File->New->Project...


This is a game so we select... you guessed it "Game" and then click Next
In the next dialog we will select the name and environment for the game. For product name enter "Epic Color Crash". Then enter your Organization Name. I use my name here. Then your Organization Identifier. This needs to be unique from anyone else. The way to do this is to use a domain name that you own. Have several domain names that I own. I will be using epicbiking.com for promoting and supporting my applications so I will use epic biking.com as my Identifier except the convention is to put the domain name in reverse order so com.epicbiking. Then Xcode automatically selects com.epicbiking.Epic-Color-Crash as my Bundle Identifier. This is the unique name for my app and since I own epicbiking.com I don't have to worry that someone is already using that name.
Select the language: Swift
Game Technology: SpriteKit
Devices: Universal
So it should look like this with the com.epicbiking replaced with your own domain.
Make sure you select SpriteKit not SceneKit the names are close enough that it is easy to select the wrong one.

Select Next and it will ask you where to save the projects. I'll create a new directory in my home called Projects and put it there. My home resides on the new hard drive I installed so it will not eat up my startup disk space.
(Yes, my home is called pichu766, my son was into Pokemon and when I inherited his computer I didn't bother changing it.)
After creating the projects I get the shell of a project created. It is actually a functioning app that can be run in the simulator. However the first thing I notice is a little warning sign. In order to be able to distribute the game and get it on actual devices you need to have it signed. This will require that you have a Apple Developers license. I'm not going to cover getting a license set up. If you don't want to pay to be a developer than you will have to just run the app on the simulator. If you register as a developer or already are registered as a developer you can click the "Fix Issue" button.
This is great, we now have a project with a bunch of stuff already set up for us.

  • AppDelegate.swift file:  This is required for any app, but for what we are doing we won't need to be changing the defaults so we will ignore it.
  • GameScene.swift file: This is where we will do most of our work.
  • GameScene.sks file: This allows us to layout our scene without having to write code to create elements of the scene. We will modify this adding some of the interface items for our scene.
  • GameViewController.swift file: We will do a little work here. However we will be using SpriteKit scenes and will end up with a MenuScene that will end up doing a lot of what would normally be done in the main view controller.
  • Main.storyboard file: Again we will be using SpriteKit scenes and won't be changing this file.
  • Images.xcassets group: this contains the icons for our game and a spaceship image. Delete the spaceship image, we are not writing a spaceship game. In a future step we will create the icons and put them in here.
  • LaunchScreen.xib file: For now we will leave this alone.
  • In the Supporting Files there is a Info.plist file: Ignore this and the remaining files for now.

First thing we will do is delete out the hello world spaceship code from GameScene.swift.
In the didMoveToView function delete these lines:
        let myLabel = SKLabelNode(fontNamed:"Chalkduster")
        myLabel.text = "Hello, World!";
        myLabel.fontSize = 65;
        myLabel.position = CGPoint(x:CGRectGetMidX(self.frame), y:CGRectGetMidY(self.frame));
        

        self.addChild(myLabel)
In the touchesBegan function remove these line:
            let location = touch.locationInNode(self)
            
            let sprite = SKSpriteNode(imageNamed:"Spaceship")
            
            sprite.xScale = 0.5
            sprite.yScale = 0.5
            sprite.position = location
            
            let action = SKAction.rotateByAngle(CGFloat(M_PI), duration:1)
            
            sprite.runAction(SKAction.repeatActionForever(action))
            
            self.addChild(sprite)
OK, we now have an empty SpriteKit game that we can start building on.
Now we want to add our colored balls we created in the previous step to our game. SpriteKit can us image atlases that store multiple images in one file which reduces the overall size of the images and makes the rendering of a scene faster. We want to use this so I will move the images into a directory that only has the .png files in it. I'll call it images.atlas by putting .atlas at the end of the directory name Xcode will automatically do the work to create an image atlas. It really is cool all the things SpriteKit does for you so you can concentrate on your game.
Now I want to add these files to my project, so I select File->Add Files to "Epic Color Crash"...
I will select Copy Items if needed to create a copy of my images in my project, and select Create Groups so that it will set it up as a image atlas group.

Select Add and we now when we build the app it will create an image atlas for us and SpriteKit will know how to get the images we want out of the atlas. 
Later we will want to create a few other atlases so I am going to create a group called images and put the image atlas into that group. So I right click on the images.atlas group and select New Group from Selection and then name the new group images.
Now we are ready to start writing some code.

First I'm going to create a class called ColoredBall. To start with it is simply a subclass of SKSpriteNode with nothing added. But by creating it as a new class we can add functionality to it later.
So in GameScene.sprite just below the import SpriteKit we will add the empty class for our balls.

class ColoredBall: SKSpriteNode {
}

Now let's create a function that will create a new ColoredBall and add it to our scene. I'm going to add it as the first function in the GameScene class but really the order of the functions doesn't matter. I want to pass in the location and color of the new ball. So right after class GameScene: SKScene { I'll add:
    func addColorBall(location: CGPoint, withColor color:String) {

Next I want to create the actual ColoredBall object. It is really easy to create a colored ball using one of the images from our images.atlas, we simply create a new sprite (or ColoredBall which is a subclass of Sprite) and tell it the name of the image, between Xcode and SpriteKit all the work is done to find and extract the image from the atlas.
        let sprite = ColoredBall(imageNamed: color)

I set the position to the location passed in:
       sprite.position = location

And I'm going to set the name of the sprite to be the color of the ball this will make it easy to find all the blue balls or red or whatever.
        sprite.name = color

Now I want to use the SpriteKit's physics engine to make the balls fall bounce around etc. So I create a physics body that is a circle that is the same size as the images I created. I created the balls with a highlight at the top of the ball if it rotates around it will just look wrong, so I will tell the physics body not to rotate, also I want the balls to slip around and fill in the available space so I am going to give them no friction:
        let body = SKPhysicsBody(circleOfRadius: 25)
        body.allowsRotation = false
        body.friction = 0.0
Finally I attach the physics body to the set the sprite to have that physicsBody, and add the sprite to the scene.
        sprite.physicsBody = body
        self.addChild(sprite)
    }
Here is the new function:
    func addColorBall(location: CGPoint, withColor color:String) {
        let sprite = ColoredBall(imageNamed: color)
        
        sprite.position = location
        sprite.name = color
        let body = SKPhysicsBody(circleOfRadius: 25)
        sprite.physicsBody = body
        body.allowsRotation = false
        body.friction = 0.0
        self.addChild(sprite)
    }
Now I want to make it so balls start falling into my scene. SpriteKit uses a rendering loop for each frame before it is rendered. These are the steps in the loop: 

Call the scenes update. This is where we will do most of our work like adding sprites.
Then the scene evaluates and actions and then calls didEvaluateActions. The scene then simulates any physics and the calls didSimulatePhysics. Then constraints are applied and didApplyConstraints is called, didFinishUpdate is called, and finally the scene is rendered.

We can do all of our work in the update function and in the event handling functions. I don't want to drop a new ball on every update, instead I want a have a delay between ball drops, and as the levels increase we will make that delay shorter. So I am going to add to properties to my GameScene class, lastBallDropped and newBallDelay. After the class GameScene: SKScene { add properties for the time the last ball was dropped, and the delay between drops.
    var lastBallDropped: CFTimeInterval = 0
    var newBallDelay: CFTimeInterval = 1.5

Now we can add the code to drop balls during the update. The current time is passed into update. We will compare that time with the last time a ball was dropped and see if the new ball delay has expired. If it has we will save the time that the new ball is being dropped an drop a new ball.
        if currentTime > (lastBallDropped + newBallDelay) {
                lastBallDropped = currentTime

We want a random color for the ball and a random position to drop the ball so we will use arc4random_uniform to create our random numbers.
                let colors = ["red", "yellow", "blue"]
                var xpos = Int(arc4random_uniform(UInt32(self.size.width-100) ))+50
                let ypos = self.size.height - 120
                let location = CGPoint(x: xpos, y: Int(ypos))
                var colorIndex = arc4random_uniform(3)
And then finally add the ball:
                addColorBall(location, withColor: colors[Int(colorIndex)])

The GameScene.swift file should now look like this:
//
//  GameScene.swift
//  Epic Color Crash
//
//  Created by Daniel Burton on 7/25/15.
//  Copyright (c) 2015 Daniel Burton. All rights reserved.
//

import SpriteKit

class ColoredBall: SKSpriteNode {
}

class GameScene: SKScene {
    var lastBallDropped: CFTimeInterval = 0
    var newBallDelay: CFTimeInterval = 1.5

    func addColorBall(location: CGPoint, withColor color:String) {
        let sprite = ColoredBall(imageNamed: color)
        
        sprite.position = location
        sprite.name = color
        let body = SKPhysicsBody(circleOfRadius: 25)
        sprite.physicsBody = body
        body.allowsRotation = false
        body.friction = 0.0
        self.addChild(sprite)
    }

    
    override func didMoveToView(view: SKView) {
        /* Setup your scene here */
    }
    
    override func touchesBegan(touches: Set<NSObject>, withEvent event: UIEvent) {
        /* Called when a touch begins */
        
        for touch in (touches as! Set<UITouch>) {
        }
    }
   
    override func update(currentTime: CFTimeInterval) {

        // if the time has come to drop a new ball
        if currentTime > (lastBallDropped + newBallDelay) {
                lastBallDropped = currentTime
                let colors = ["red", "yellow", "blue"]
                var xpos = Int(arc4random_uniform(UInt32(self.size.width-100) ))+50
                let ypos = self.size.height - 120
                let location = CGPoint(x: xpos, y: Int(ypos))
                var colorIndex = arc4random_uniform(3)
                addColorBall(location, withColor: colors[Int(colorIndex)])
        }

    }
    

}

We can now build the app and run it on a simulator. Colored balls will appear near the top and fall of the bottom of the screen. Not exactly what we want. We want them to stay in the scene. So lets add a border to contain the balls. Add one line to the didMovetoView function to create a physicsBody that is an edge loop. The physics engine will not apply physics to the edge loop but other objects that are affected by the physics engine will bounce off the edge instead of just going through it. We will just create the loop as a rectangle that is the size of our scene. All of this in one simple line:

    override func didMoveToView(view: SKView) {
        /* Setup your scene here */
        self.physicsBody = SKPhysicsBody(edgeLoopFromRect: self.frame)

    }

OK now it drops ball but we can see that our scene is actually bigger than the screen. Also we want the game to be the same no matter what device it is running on so that on an iPad you don't have a big area that holds hundreds of balls and on an old iPhone you have a scene that only holds a few dozen. So I am going to resize the scene and then have SpriteKit scale the scene to fit the device.

First I select the GameScene.sks file in the Navigator panel, and then in the Utilities panel on the right I click on the node inspector icon, a circle with four little circles in the corners (OK, I know circles don't have corners.) I can now set the background color to black and the size to 422 by 750. 


Now back in the didMoveToView function I set the scale mode AspectFit, scale to fit the full scene in on the screen but keep the x scale and y scale the same.
        self.scaleMode = .AspectFit

Now if we run it on any of the simulators we should get a consistent game area. Here is the GameScene.swift file so far:
//
//  GameScene.swift
//  Epic Color Crash
//
//  Created by Daniel Burton on 7/25/15.
//  Copyright (c) 2015 Daniel Burton. All rights reserved.
//

import SpriteKit

class ColoredBall: SKSpriteNode {
}

class GameScene: SKScene {
    var lastBallDropped: CFTimeInterval = 0
    var newBallDelay: CFTimeInterval = 1.5

    func addColorBall(location: CGPoint, withColor color:String) {
        let sprite = ColoredBall(imageNamed: color)
        
        sprite.position = location
        sprite.name = color
        let body = SKPhysicsBody(circleOfRadius: 25)
        sprite.physicsBody = body
        body.allowsRotation = false
        body.friction = 0.0
        self.addChild(sprite)
    }

    
    override func didMoveToView(view: SKView) {
        /* Setup your scene here */
        self.scaleMode = .AspectFit

        self.physicsBody = SKPhysicsBody(edgeLoopFromRect: self.frame)

    }
    
    override func touchesBegan(touches: Set<NSObject>, withEvent event: UIEvent) {
        /* Called when a touch begins */
        
        for touch in (touches as! Set<UITouch>) {
        }
    }
   
    override func update(currentTime: CFTimeInterval) {

        // if the time has come to drop a new ball
        if currentTime > (lastBallDropped + newBallDelay) {
                lastBallDropped = currentTime
                let colors = ["red", "yellow", "blue"]
                var xpos = Int(arc4random_uniform(UInt32(self.size.width-100) ))+50
                let ypos = self.size.height - 120
                let location = CGPoint(x: xpos, y: Int(ypos))
                var colorIndex = arc4random_uniform(3)
                addColorBall(location, withColor: colors[Int(colorIndex)])
        }

    }
    

}

In the next step we will start adding in some game logic.

Creating Shinny Balls -- Epic Color Crash Step 1

Preview: This will be the end results of Step 1:


Now that I have enough disk space available on my computer I can start to build my game. (In the previous post I replaced my internal CD-ROM with a hard drive to get rid of the "startup disk is full" warnings)

The Idea

First I need a game idea, something not too complicated but a bit different from other games. My wife was the master Tetris game player. On the Game Boy she would start out at the highest level available and somehow still be able to place all the tiles in the right places. She was so good at it that one day the Game Boy in an effort to keep up with her exploded. Seriously the batteries inside the game exploded. I also have played games like Klax on the Atari Lynx and Collapse on the Mac.

For my game I will have colored balls drop into the arena at random places. The balls will be one of three colors, red, yellow, or blue. Somewhat like Fruit Ninja, which I have never played my my kids seemed to like, you will be able to swipe between different colored balls which will combine the balls to create a new ball. Red and yellow balls will create an orange ball, blue and red create purple, blue and yellow create green.

I'm going to need some ball images for my game. I'll use Gimp to create my images. It is free and seems to work great for my needs. You can download and install it from http://www.gimp.org

Installing Gimp

To keep my startup disk from getting filled I will be installing my developer applications on my new hard drive. So first I will create a folder for the new developer applications on the new hard drive. In Terminal:

mkdir /Volumes/EpicBiking/Applications
mkdir /Volumes/EpicBiking/Applications/Developer

And then I want to create a symbolic link to the Applications folder where all the other applications are stored.

ln -s /Volumes/EpicBiking/Applications/Developer/ /Applications/Developer

Following the links above I download Gimp, and then I can drag and drop the Gimp application to my /Applications/Developer folder and start up Gimp.
I will create the ball to be 50 pixels in diameter so I need a new image that is 50 x 50 pixels.

To make it easier to see what I am doing I am going to zoom in to 400%. At the bottom of the window is a pop up menu that lets you select the zoom.
I don't want a white background, I want the background to be transparent:
From the menu select Layer->Transparency->Add Alpha Channel

And then I will create a new transparent layer:
From the menu select Layer->New Layer, make sure Layer Fill Type is Transparency, and click OK
Now I want to delete the old white background. From the Layers and Brushes window, (if this is not open you can go to the menu item Windows->Dockable Dialogs-Layers) select and delete the white background.
Then go to the Toolbox window (Windows->Toolbox) and select the eclipse tool.
Now I will drag out an eclipse on the transparent background. I'm not worried about the size, shape, or location I will set them in the next step.

Now go to the Toolbox and set the Position to 0 and 0 and the size to 50 and 50
Now select the bucket fill tool, and set the color to be red.

Then click in the circle that we drew and fill it with red.
Now we want to make it look shiny. So first I am going to make the edges darker. I create a new selection using the eclipse tool like before but this time make the location 1,1 and the size 47,47

And now I am going to fill it with a gradient. Select the gradient tool
Then I am going to click at the bottom of my circle and drag all the way to the top of the window. If I just drag to the top of the circle the top of the circle will be too white, but by dragging past the top the white part of the gradient will be cut off. You can drag several times if needed until you find a nice gradient that you like.
OK, it is looking decent, but we want a little shine on the top, so using the eclipse tool again I will select a small oval near the top of the ball. I'll make it a little off center to give the impression we have light coming from the upper left.
Now we will fill the oval with a gradient from white to transparent. Select the gradient tool, change the foreground color to white, and click on the box that is left of the "Gradient" and below the Opacity setting, and select the setting that is 'FG to Transparent"
Now we will drag a line by clicking above and to the left of the ball and drag down to the bottom of the oval. If it doesn't come out just right you can use undo and then try again until you get the highlight you want.
In the menu Select->None and change the zoom to 100% to see the final results.
 Cool we have a red ball. Now we can repeat that for yellow, blue, green, purple, and orange, or we can use a little trick with hues. The cool thing is SpriteKit has an easy way to do this and we could get away with just one ball, but I am going to eventually turn this into a cocos2d-x project so I will create balls for each color. Fist I save my red ball. I like to keep the original gimp format of the image and then export it as an png.

After saving the files now instead of creating a new blue ball lets just change this one to be blue. This is going to be EASY!
Select the menu Colors->Hue-Saturation set the Hue value to be -140 and magically we have a blue ball.

Cool, save that as blue and export it as blue.png
Now select undo to go back to the red ball, then go to Hue-Saturation and set it to -90 to get a purple ball, save that, then undo the hue change going back to red and then set hue to 140 for a green ball, 60 makes a nice yellow ball, and 30 makes a nice orange ball.

I told you that would be easy. We now have all the colored ball images, and we are ready to start programming.


Thursday, July 23, 2015

Replacing the CD-ROM with a Hard Drive and Freeing up Space on the Boot Volume

Creating the Epic Color Crash Game

Step -1 Replacing the CD-ROM with a Hard Drive and Freeing up Space on the Boot Volume

I have a great MacBook Pro that I inherited from my son. He really wanted a SSD drive in the computer which at the time he bought it was a rare thing. So he got an SSD drive but that meant that it was a 120 gig drive. With all of my pictures and videos of biking I have always been battling the problem of having the drive run out of space and then OS X complains about the startup disk being out of space. I want to use this computer for my iOS development because it allows me to move around, and the room that is housing my Mac Mini is packed full of bike stuff that I am slowly selling on eBay and so it just feels crowded in there.

I hardly ever have used the CD-ROM drive in the computer so the logical solution is to replace the internal CD-ROM drive with a hard drive. There are some nice SSD drive options but I decided to go for the most space for the least amount of money. I selected the MCE OptiBay adaptor with a 2 terabyte drive.


The drive arrived on the day of my daughters wedding so the actual installation would have to wait a couple of days. The drive came pre assembled into the OptiBay adaptor, nice but even if it hadn't been pre installed putting it into the adaptor would be an easy task. Also included with the drive was a little screwdriver for installation. This is a great bonus that I was not expecting. The problem with opening the MacBook is the screws need a fine point screwdriver, which is not something that everyone has.
Drive and Screwdriver
The first step is to shut down the computer. I rarely actually turn the computer off, but before messing around inside the computer you want to make sure the computer is off not just sleeping. Then unscrew the 10 small screws on the bottom of the computer. The screwdriver MCE sent for this has two phillips screwdriver bits. Given the size of the screws it would seem like you would want to use the small bit. However the small bit is too small for these screws and will strip out the screws. The larger bit fits the screws nice and solidly and is perfect for removing the screws. As a basic rule you always use the largest screwdriver bit that will fit.
I like to keep the screws organized as I remove them to make it easy to pick the right screw when replacing them. Another trick that works real well is after removing the cover, stick the screws back into the holes and screw them in a couple of turns. It keeps the screws from getting lost and helps you remember which screw goes where.

Here is the first look inside the computer. The drive I am going to replace is in the top left corner.


First I remove the screws for the speaker unit that is over the drive, and just move it out of the way.
Then carefully remove the cables attached behind the drive. These pop of easily, but you don't want to damage the cable or connectors. I have seen tools used to pry these off but just pulling gently on the connecters works fine.
There are a few small screws holding the drive into the computer. Remove those screws and place them in organized piles, and gently pull the drive out of the computer. There are a couple of items that need to be moved from the old drive to the new adaptor, a cable, and a mounting tab.

There are two screws that attach the mounting tab to the drive.

Simply remove the tab from the CD-ROM drive and install it on the adaptor. Also pull the cable off the CD-ROM drive and install it on the adaptor.

Now everything goes back together. This really is simple, the adaptor with the new drive in it easily slips back into where the CD-ROM drive came out.
Replace the screws that secure the drive in place, and plug the cables back in. Make sure all the cables are securely attached back into their sockets. I found the cable closes to the fan, pictured here, the most difficult to connect. If any of these cables are not fully connected it obviously will not work when you turn the computer back on.
Here is a picture with everything back in place:

Replace the bottom cover and replace the screws. OK, that really was easy. Now lets get things set up.


Open up Disk Utility. The new hard drive shows up in the list of drives. First we need to format the drive so that OS X can use it. Select the drive, and then select the "Erase" option.

Select the format that you want to use. I like to use the "Mac OS Extended (Journaled)" format. Then give the drive a name. Use whatever name you want, but I like something without spaces as it makes it easier to type the name of the drive in Terminal. I chose EpicBiking.
I'm going to move all of my User files to the new hard drive which will leave the SSD drive with plenty of space of memory swapping and other system uses. When I install MySQL in the future it will also end up on the new drive. So, the first step is to create a directory called Users.
 Then I simply copy all of the folders in the Users folder on Macintosh HD to the Users folder on the new hard drive, and sit back and wait a few minutes.
Then open up Terminal. These next steps can be done with the graphical interface but I find it easier to just use Terminal for this.
Change to the root directory:

cd /

Now I'm going to rename the old Users directory to Users.old, but to do this I need Administrator rights. Type the command:

sudo mv /Users /Users.old

sudo makes it so the command is run as "super user", the administrator. mv command renames, or moves, the directory. You will be prompted for the password for the administrator. Which in my case is simply my password since my user account has administrator rights.
Next I am going to create a symbolic link to the Users folder on the new drive. The symbolic link simply makes it so the directory on the new drive shows up in the directory structure where the Users directory is expected to be, in the root of the directory structure.

sudo ln -s /Volumes/EpicBiking/Users /Users

As the super users we create a link using the ln command. -s tells it to create the link as a symbolic link, this is necessary for a few reasons. We are linking between two different physical drives and so a hard link would not work, besides it is rare that you actually want to create a hard link.

At this point I reboot the computer to make sure that all the open files in the old users directory are closed, and that everything is now using the new users directory.

After logging back in, once again go into Terminal.

Now the scary part, deleting all the old files. We copied the files from the old Users directory to the new directory so everything should be fine, but if you are paranoid this is where you would want to make sure there is an additional backup for your files. Once the next command is executed the original Users directory will be permanently gone.

sudo rm -rf /Users.old

This removes the old users directory and everything inside them. The f option says to force the command, or in other words just do it and don't ask any questions. sudo rm -rf can be a deadly command if used improperly.

OK, now my boot disk has plenty of room, my new drive has my users files and things are looking great.

Step 0 in the developing my game will be getting the development environment set up.


My Bicycle Store