Preview: This will be the end results of Step 1:

Now that I have enough disk space available on my computer I can start to build my game. (In the previous post I replaced my internal CD-ROM with a hard drive to get rid of the "startup disk is full" warnings)
The Idea
First I need a game idea, something not too complicated but a bit different from other games. My wife was the master Tetris game player. On the Game Boy she would start out at the highest level available and somehow still be able to place all the tiles in the right places. She was so good at it that one day the Game Boy in an effort to keep up with her exploded. Seriously the batteries inside the game exploded. I also have played games like Klax on the Atari Lynx and Collapse on the Mac.For my game I will have colored balls drop into the arena at random places. The balls will be one of three colors, red, yellow, or blue. Somewhat like Fruit Ninja, which I have never played my my kids seemed to like, you will be able to swipe between different colored balls which will combine the balls to create a new ball. Red and yellow balls will create an orange ball, blue and red create purple, blue and yellow create green.
I'm going to need some ball images for my game. I'll use Gimp to create my images. It is free and seems to work great for my needs. You can download and install it from http://www.gimp.org
Installing Gimp
To keep my startup disk from getting filled I will be installing my developer applications on my new hard drive. So first I will create a folder for the new developer applications on the new hard drive. In Terminal:
mkdir /Volumes/EpicBiking/Applications
mkdir /Volumes/EpicBiking/Applications/Developer
mkdir /Volumes/EpicBiking/Applications/Developer
And then I want to create a symbolic link to the Applications folder where all the other applications are stored.
ln -s /Volumes/EpicBiking/Applications/Developer/ /Applications/Developer
Following the links above I download Gimp, and then I can drag and drop the Gimp application to my /Applications/Developer folder and start up Gimp.


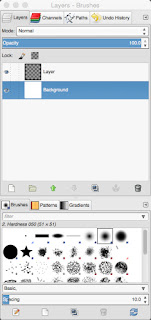
To make it easier to see what I am doing I am going to zoom in to 400%. At the bottom of the window is a pop up menu that lets you select the zoom.

From the menu select Layer->Transparency->Add Alpha Channel
And then I will create a new transparent layer:
From the menu select Layer->New Layer, make sure Layer Fill Type is Transparency, and click OK


Now go to the Toolbox and set the Position to 0 and 0 and the size to 50 and 50


Then click in the circle that we drew and fill it with red.


And now I am going to fill it with a gradient. Select the gradient tool


After saving the files now instead of creating a new blue ball lets just change this one to be blue. This is going to be EASY!
Select the menu Colors->Hue-Saturation set the Hue value to be -140 and magically we have a blue ball.


Cool, save that as blue and export it as blue.png
Now select undo to go back to the red ball, then go to Hue-Saturation and set it to -90 to get a purple ball, save that, then undo the hue change going back to red and then set hue to 140 for a green ball, 60 makes a nice yellow ball, and 30 makes a nice orange ball.
I told you that would be easy. We now have all the colored ball images, and we are ready to start programming.


No comments:
Post a Comment